
Proper alignment is essential for your GoTo telescope to accurately locate and track objects. Start by preparing your mount, ensuring it’s stable and calibrated with known stars. Choose the best alignment method for your skill level and sky conditions, then carefully align and calibrate sensors before your session. Keep your mount steady and re-align if bumped or moved. Mastering these steps ensures a smoother, frustration-free night—learn more to perfect your setup.
Key Takeaways
- Proper initial alignment with accurate star selection ensures reliable object targeting throughout your session.
- Confirm that star charts match current sky positions and environmental conditions to prevent misalignment errors.
- Maintain mount stability and perform regular software updates to optimize tracking accuracy and system performance.
- Recalibrate sensors and re-align after moving or bumping the telescope to preserve precise pointing.
- Use advanced techniques like multi-star and drift alignment for superior tracking during extended observations.

Astromania Laser Collimator for Newtonian Dobsonian Marca Telescopes, Telescope Alignment 1.25 Inch with 7 Red Laser Bright Levels, Great Telescope Accessories Laser Alignment Tool for Collimation
- Compatible with 1.25-inch Telescopes: Fits standard reflector telescopes
- Precise Collimation Tool: Ensures quick, accurate alignment
- Durable Metal Construction: Made with anodized aluminum for longevity
As an affiliate, we earn on qualifying purchases.
As an affiliate, we earn on qualifying purchases.
Why Proper Alignment Is Key to Your GoTo Telescope’s Accuracy
Proper alignment is essential because it guarantees your GoTo telescope can accurately locate and track celestial objects. Visual calibration ensures your telescope’s optics are aligned with your view, reducing errors caused by misaligned lenses or mirrors. It helps refine sensor sensitivity, so the telescope can detect faint objects and respond precisely to commands. When your alignment is accurate, the telescope’s internal sensors correctly interpret star positions, improving tracking accuracy. Without proper calibration, even small misalignments can cause the telescope to drift or miss objects entirely. Ensuring your system is well-calibrated enhances overall performance, making stargazing more enjoyable. Proper alignment builds confidence in your telescope’s capabilities and maximizes the effectiveness of your GoTo system during your night sky explorations. Additionally, understanding the importance of contrast ratio can help you optimize your viewing conditions for clearer, more detailed observations.
How to Choose the Best Alignment Method for Your Skill Level and Location
Choosing the right alignment method depends on your skill level and your observing location. If you’re a beginner, a simple two-star alignment using star charts may suffice, especially in stable sky conditions. This method is quick and easy, helping you get started without much hassle. If you’re more experienced, you might prefer a more advanced alignment, like a three-star or automatic process, which offers greater accuracy in variable sky conditions. Consider your location’s light pollution and atmospheric stability; darker skies make star identification easier, while urban areas might require more precise methods. Matching your skills and environment ensures smoother alignment, saving you time and frustration. Always evaluate your comfort with star charts and your ability to identify celestial objects before choosing an alignment method. Exploring new content formats can also help you discover innovative tools and techniques to improve your alignment process.
Preparing Your Telescope Before Starting the Alignment
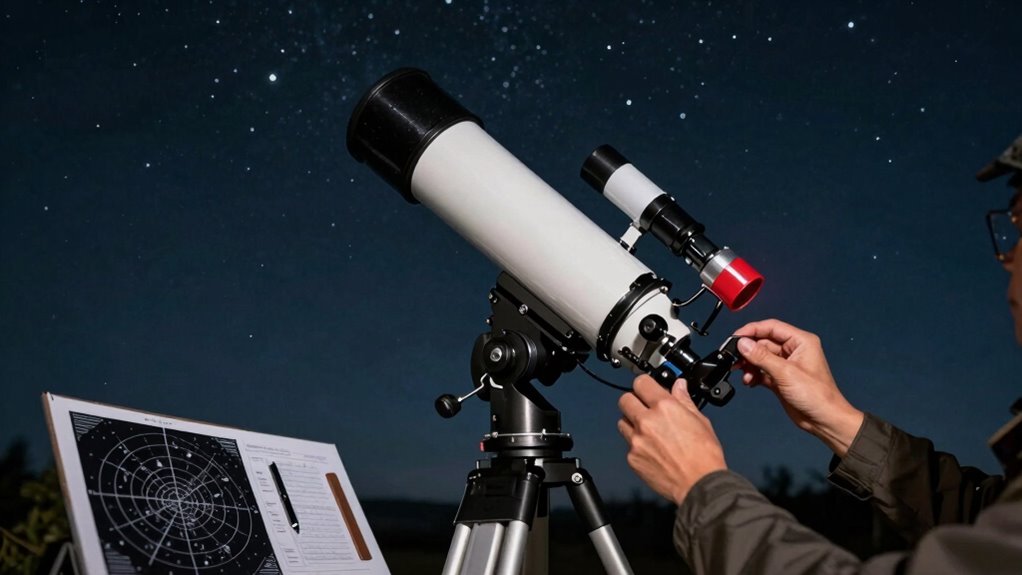
Before you begin the alignment process, it’s vital to prepare your telescope to guarantee smooth setup and accurate results. First, power on your telescope and confirm it’s on a stable surface. Perform a quick visual calibration by checking that the finderscope and main optics are aligned; this helps with initial pointing accuracy. Next, focus on the optical alignment, making sure your lenses or mirrors are properly aligned to eliminate any distortions or misalignments. Clean any dust or smudges on the lenses to prevent image degradation. Confirm that your mount is secure and properly balanced, reducing strain during tracking. Proper preparation minimizes errors during alignment and guarantees your GoTo system accurately locates celestial objects, making your night under the stars more enjoyable.
How to Calibrate Your Telescope’s Sensors for Accurate Tracking
To guarantee your telescope tracks accurately, you need to calibrate its sensors properly. This involves using specific techniques to align the sensors with known celestial objects. When done correctly, your telescope will have precise guidance for every observation session.
Sensor Calibration Techniques
Calibrating your telescope’s sensors is essential for achieving precise tracking and clear images. Sensor drift can cause inaccuracies over time, making regular calibration necessary. To calibrate effectively, start by selecting calibration stars—bright, well-documented stars with known positions. Point your telescope at a calibration star and record its position, then move to a second star, repeating the process. Many GoTo telescopes have built-in calibration routines that guide you through this process. Verify your mount is level and stable before beginning. Accurate calibration stars help your system recognize and correct for sensor drift, maintaining precise tracking during your session. Regular calibration keeps your telescope’s sensors aligned with celestial movements, ensuring sharp images and reliable GoTo performance. Incorporating AI-powered data analytics can further optimize calibration procedures by providing real-time feedback and adjustments.
Aligning Sensors With Celestial Objects
Have you ever wondered how your telescope’s sensors stay accurately aligned with celestial objects? Proper sensor calibration is essential to ensure your GoTo system tracks objects precisely. Start by selecting a bright, easily identifiable celestial object, like a prominent star or planet. Use this object for calibration, ensuring it’s centered in your eyepiece or camera view. Then, adjust your sensors to match this reference point, fine-tuning their alignment with the actual position of the object. Accurate celestial object selection simplifies this process, reducing errors. Regularly repeating sensor calibration before each session helps maintain reliable tracking. By aligning your sensors with carefully chosen celestial objects, you enhance your telescope’s ability to locate and follow objects accurately, making your night under the stars smooth and enjoyable.
Step-by-Step Guide to Aligning Your GoTo Telescope
To get your GoTo telescope properly aligned, start by selecting a precise location with a clear view of the sky. Next, perform accurate polar alignment to make sure your mount tracks celestial objects correctly. Finally, calibrate your telescope mount to fine-tune its tracking and pointing accuracy.
Precise Location Selection
Choosing the precise location for your GoTo telescope is vital to guarantee accurate pointing and reliable tracking. To do this effectively, consider these steps:
- Find a dark spot away from bright lights to minimize light pollution, which can obscure your view of the star field.
- Select an area with a clear, unobstructed view of the sky, avoiding trees or buildings that block celestial targets.
- Ensure stable ground to prevent vibrations that can affect alignment.
- Check for minimal atmospheric disturbance, like haze or humidity, which can distort star visibility.
Accurate Polar Alignment
Accurate polar alignment is essential for precise star tracking and astrophotography with your GoTo telescope. Proper alignment ensures your mount follows celestial objects smoothly, reducing drift during long exposures. To achieve this, calibrate your polar scope precisely by aligning its reticle with Polaris or the North Celestial Pole. Use the table below to verify your setup:
| Step | Action | Tip |
|---|---|---|
| Set Mount Latitude | Adjust mount to your latitude | Use a compass or GPS for accuracy |
| Level the Mount | Ensure the mount is level | Use a bubble level |
| Rough Polaris Alignment | Center Polaris in the eyepiece | Use the mount’s slow-motion controls |
| Fine Tuning | Calibrate the polar scope | Match the reticle with Polaris position |
| Confirm Star Tracking | Observe object movement over time | Make small adjustments as needed |
Additionally, accurate polar alignment is crucial for maximizing the effectiveness of your astrophotography sessions and ensuring you capture sharp images of the night sky.
Telescope Mount Calibration
Have you ever wondered how to guarantee your GoTo telescope points accurately? Proper mount calibration is essential. First, ensure your mount is stable—any wobble affects pointing precision. Next, check for recent software updates; they often improve alignment accuracy and fix bugs. Then, perform a thorough star alignment, making sure the mount tracks smoothly without jitter. Finally, regularly recheck mount stability and update software when needed. These steps keep your telescope aligned and ready for precise object targeting. Mount stability minimizes errors, while software updates enhance overall performance. Consistent calibration ensures your GoTo system functions reliably, giving you confidence during your night sky adventures. Proper mount calibration is the foundation for accurate and enjoyable stargazing sessions.
Troubleshooting Common Alignment Errors and How to Fix Them
Even experienced astronomers encounter alignment errors that can disrupt your telescope’s performance. One common mistake is misidentifying stars, especially if you rely solely on a star chart in areas affected by light pollution. Bright skies can obscure stars, leading to incorrect alignments and inaccurate GoTo tracking. Double-check your star identification by comparing your star chart with what you see through the eyepiece. If your telescope consistently points off-target, recalibrate your mount and ensure you’re selecting the right stars during alignment. Also, avoid relying on bright, easily confused stars in light-polluted skies. Taking extra time to verify star positions and using a detailed star chart helps prevent these errors, ensuring your telescope’s alignment remains accurate and your viewing session stays smooth. Additionally, understanding your mount’s capabilities can help you troubleshoot and improve alignment accuracy.
How to Keep Your Telescope Properly Aligned During Your Night of Observing
To keep your telescope properly aligned throughout the night, you need to perform regular checks to catch any drift early. Environmental factors like temperature changes and wind can shift your alignment, so managing these impacts is vital. Staying attentive ensures your telescope stays precise, so you get the best possible observations. Additionally, understanding the importance of proper maintenance of optical components can help maintain alignment and image quality during your session.
Regular Alignment Checks
Regular alignment checks are essential to guarantee your telescope stays accurately pointed throughout your observing session. As the sky conditions change and you move across different objects, slight misalignments can occur. To stay on track, consider these steps:
- Periodically compare your target with star charts to confirm your alignment.
- Use your GoTo controls to make small adjustments based on visible discrepancies.
- Keep an eye on star movement; if stars drift from their expected position, realign your telescope.
- Recheck the alignment after significant sky changes or if you switch to a different celestial object.
- Remember that Free Floating optical systems can be more sensitive to misalignment, so frequent checks are especially important.
These quick checks help you maintain precise tracking, ensuring you get the most out of your night under the stars. Regularly verifying your alignment keeps your telescope accurate, regardless of sky conditions.
Environmental Impact Management
Environmental factors can have a significant impact on your telescope’s alignment during a night of observing. Solar flares can cause sudden brightness changes, affecting your view and requiring realignment. Atmospheric distortion, caused by temperature shifts and turbulence, can shift your telescope’s position and degrade image quality. To manage these effects, monitor weather conditions and avoid observing during high solar activity. Use the following table to understand key factors:
| Factor | Impact | Mitigation |
|---|---|---|
| Solar flares | Brightness fluctuations, misalignment | Pause observations during flare peaks |
| Temperature shifts | Air turbulence, image distortion | Allow equipment to acclimate |
| Wind | Vibrations, movement | Secure mount and shield telescope |
| Humidity | Dew, optical interference | Use dew shields and heaters |
Managing these factors keeps your telescope aligned and your viewing sharp. Additionally, being aware of environmental conditions can help you anticipate and respond to changes more effectively during your observing session.
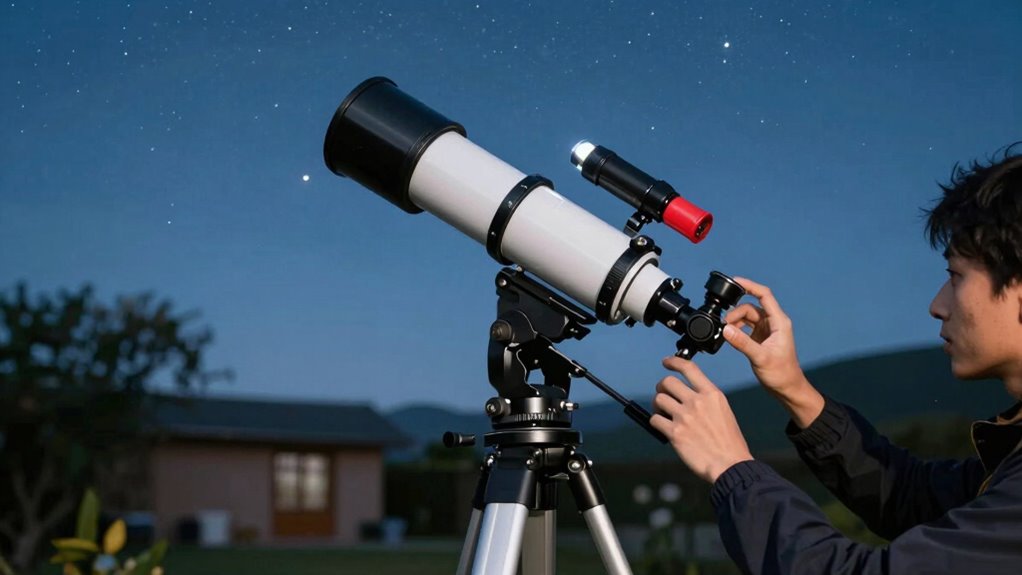
How to Re-Align Your Telescope After Moving or Bumping It
After moving or bumping your telescope, it’s vital to re-align it to guarantee accurate star tracking and mount stability. This ensures your views stay sharp and centered. To re-align efficiently:
After bumping your telescope, re-align to ensure precise tracking and stable views.
- Secure the mount and check for stability to avoid further shifts.
- Use your finderscope or alignment stars to verify your initial position.
- Re-center the alignment stars through your eyepiece or camera.
- Run a quick star alignment routine to fine-tune your goto system.
This process helps your telescope regain precise star tracking, even after minor disturbances. Maintaining mount stability during the re-alignment process is essential for accuracy. With a quick check and adjustment, you’ll be ready to continue your night of stargazing without frustration.
Advanced Techniques to Improve Your Telescope’s Tracking Performance
To maximize your telescope’s tracking accuracy, you can implement several advanced techniques that go beyond basic alignment. One effective method is refining star alignment methods, choosing multiple stars for better calibration. Additionally, autoguiding techniques, such as using a guide scope or off-axis guider, can correct minor tracking errors in real-time. By continuously monitoring a guide star, autoguiders make precise adjustments, reducing drift during long exposures. It is also important to regularly perform periodic error correction to account for mechanical inconsistencies in your mount. Combining these strategies ensures your telescope maintains accuracy over extended periods. To help visualize, here’s a quick overview:
| Technique | Purpose | Equipment Needed |
|---|---|---|
| Multi-star alignment | Improve calibration accuracy | Multiple bright stars |
| Autoguiding | Real-time correction | Guide scope/controller |
| Periodic error correction | Minimize mechanical errors | PEC training software |
| Drift alignment | Fine-tune polar alignment | Stable mount, star tracker |
| Software calibration | Optimize tracking algorithms | Autoguide software |
Final Checks and Best Practices for a Successful Night of Astronomy
Preparing for a successful night of astronomy requires thorough final checks to guarantee everything runs smoothly. First, review your star charts to confirm your target objects are visible and well-positioned. Next, check sky conditions—look for clear skies and minimal light pollution. Then, verify your telescope’s alignment and that your GoTo system is calibrated correctly. Finally, ensure your batteries are charged, and equipment is secure. It is also helpful to review your Privacy Policy to understand how your data is managed during setup and use. To recap: 1. Confirm star charts match current sky positions. 2. Assess sky conditions for maximum viewing. 3. Double-check telescope alignment and calibration. 4. Prepare your power sources and secure all gear. Following these steps helps prevent surprises, so you can focus on enjoying the night’s views with confidence.
Frequently Asked Questions
Can I Align My Goto Telescope Without Prior Star Chart Knowledge?
Yes, you can align your GoTo telescope without prior star chart knowledge. Modern telescopes often feature automatic or simplified alignment methods that guide you through the process using on-screen prompts. While having a star chart can improve accuracy, it’s not strictly necessary. The key is to follow the alignment instructions carefully, use the provided finder scope, and verify your telescope is pointing correctly during setup.
How Often Should I Realign My Telescope During a Session?
Like a dancer adjusting their steps, you should realign your telescope as needed during your session. Usually, check alignment every hour or so, especially if you move the telescope or notice tracking issues. For best results, use quick realignment tips such as centering stars or using a reticle eyepiece. Frequent realignment helps maintain accuracy, making sure your night under the stars stays smooth and enjoyable.
What Tools or Apps Can Assist With Telescope Alignment?
You can use star chart apps like Stellarium or SkySafari to assist with telescope alignment. These apps help identify stars and celestial objects, making your setup easier. Additionally, smartphone mount adapters allow you to attach your phone securely to your telescope, so you can use these apps hands-free. With these tools, you’ll find it simpler to align your telescope accurately, ensuring clear views and a more enjoyable stargazing experience.
Is Manual Alignment More Accurate Than Automated Methods?
Manual alignment is often more precise because you can fine-tune your setup like a master craftsman adjusting a delicate instrument. I once spent extra time aligning my telescope manually, and my stargazing session was crystal clear all night. Automated convenience is great for quick setups, but for the best precision, manual alignment lets you control every detail, ensuring your telescope hits its mark with greater accuracy and helps you enjoy sharper, more detailed views.
How Does Weather Affect Alignment Stability Overnight?
Weather variability and temperature fluctuations can profoundly impact your alignment stability overnight. As temperatures change, materials expand or contract, causing slight shifts in your telescope’s position. Humidity and wind can also disturb your setup, leading to misalignment. To maintain accuracy, you should check and refine your alignment periodically, especially during extreme weather changes. Properly securing your telescope and using stable mountings helps minimize these weather-related effects.
Conclusion
Don’t let tricky alignments ruin your night—if you follow these steps, your telescope will stay accurate and reliable. Some might think alignment takes too much time, but once you get the hang of it, it becomes quick and effortless. With proper prep and regular checks, you’ll enjoy clear, steady views without frustration. Keep practicing, and soon, you’ll be confidently exploring the stars with a perfectly aligned telescope every time.