To fix ugly edges and shadows on your green screen, focus on proper lighting techniques. Use soft, diffused lights placed evenly around the green backdrop to eliminate hotspots and shadows. Position your subject at a proper distance and add backlights or fill lights to reduce harsh shadows and boost separation. Matching light color temperature and adjusting intensity also help create a clean, seamless key. Keep these tips in mind, and you’ll reveal more professional results.
Key Takeaways
- Use diffused, soft lighting sources placed evenly to eliminate shadows and prevent harsh edges on the green screen.
- Position backlights and fill lights strategically to add depth and reduce unwanted shadows and transparency issues.
- Match the color temperature of all lights (~5600K) for consistent green hue and minimal color spill.
- Regularly monitor and adjust light placement and intensity to maintain even coverage and clean edges.
- Incorporate professional equipment like softboxes, barn doors, and flags to control spill and achieve a seamless green screen effect.

LINCO Lincostore Photo Video Studio Light Kit AM169 – Including 3 Color Backdrops (Black/White/Green) Background Screen
- Softbox Reflectors: 2x 24×24 inch with diffusers
- Photo Umbrellas: 2x 33-inch diffusing umbrellas
- Adjustable Lamp Holders: 4 durable, spring-clip lamp holders
As an affiliate, we earn on qualifying purchases.
As an affiliate, we earn on qualifying purchases.
Why Proper Green Screen Lighting Eliminates Shadows and Improves Keying

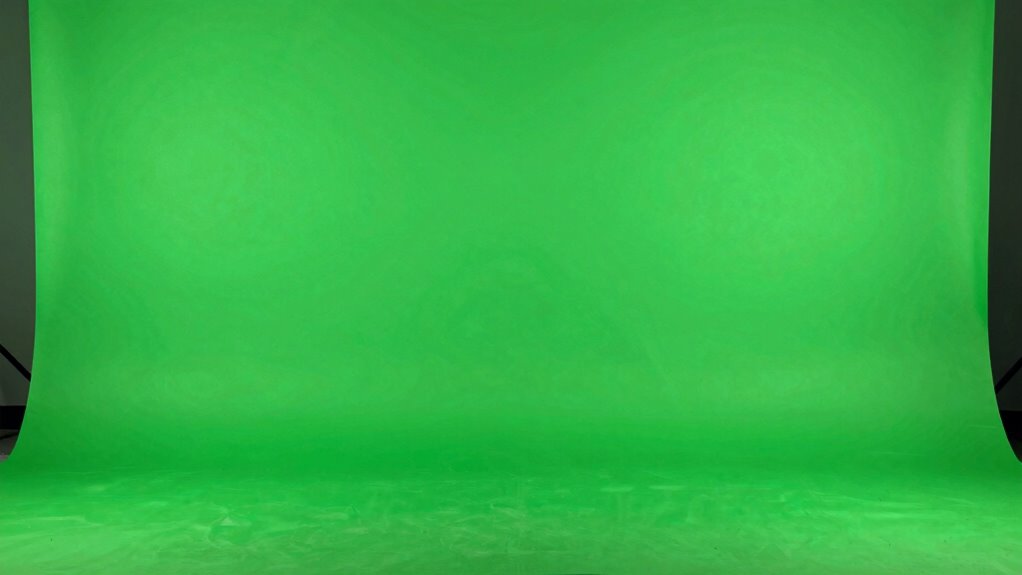
Proper green screen lighting is essential because it prevents shadows from falling on the backdrop, which can cause uneven color and make keying difficult. When you set up your green screen, using the right lighting equipment ensures a consistent, bright background free of dark spots. A well-planned green screen setup evenly illuminates the backdrop, reducing shadows that can create jagged edges or transparency issues during keying. Avoid placing lights too close or unevenly, as this can cast unwanted shadows or hot spots. Instead, position your lights at appropriate angles to minimize shadow cast. Good lighting equipment, such as softboxes or LED panels, helps you achieve uniform coverage. This consistency simplifies the process of removing the background cleanly, resulting in a professional-looking composite. Additionally, understanding digital concepts can help you optimize your lighting setup for better keying results.
Mastering Green Screen Lighting Color and Brightness
Achieving consistent green screen lighting depends heavily on mastering the color and brightness of your setup. You need to match the color temperature of your lights to ensure a uniform green hue, preventing color shifts that can complicate keying. Brightness consistency is equally important; fluctuations can cause shadows or uneven edges. Use the following table to understand key aspects:
| Aspect | Tip |
|---|---|
| Color temperature | Keep lights at the same Kelvin rating (around 5600K) for uniformity |
| Brightness consistency | Use dimmers or stable power sources to maintain even light levels |
| Color matching | Test lights with a color meter before shooting |
| Brightness control | Regularly check and adjust during setup |
Additionally, monitoring the lighting environment helps ensure that no unintended color shifts occur during filming.
Mastering these elements creates a smooth, even green background, making post-production much easier.
Positioning Lights for Even Illumination and Soft Shadows

Positioning your lights correctly is essential to ensuring even illumination and soft shadows on your green screen. Start by placing your diffusers properly; they should sit close to your light sources to soften the output and reduce harsh shadows. Keep diffuser placement consistent across all lights to achieve uniform light distribution. Adjust light intensity carefully—avoid overly bright spots or dim areas—by tweaking your light settings or using dimmers. Position your key light at a 45-degree angle to the green screen, with fill lights on the opposite side to fill in shadows without creating harsh edges. Ensure your lights are evenly spaced and at the same height to prevent uneven lighting. Proper positioning and diffuser placement will help you achieve a smooth, professional look with minimal shadows. Additionally, using lighting troubleshooting techniques can help identify and fix common issues like hotspots or uneven coverage, ensuring your green screen looks flawless.
Choosing Light Modifiers to Reduce Harsh Edges

To soften light edges on your green screen, consider using diffusers and reflectors. These tools help spread light evenly and reduce harsh shadows that can interfere with your shot. Choosing the right light modifiers makes a noticeable difference in achieving clean, professional results.
Softening Light Effects
When you want to create a more flattering and natural look on your green screen, softening the light is essential. Using the right light modifiers helps reduce harsh edges and shadows, making your subject blend seamlessly. Focus on adjusting the color temperature to match your background and guarantee consistent light placement to avoid unintentional hotspots. Softening tools like softboxes or umbrellas spread light evenly, minimizing sharp progressions. Proper light placement ensures your light source wraps around your subject gently, avoiding direct, harsh beams. Here’s a quick guide:
| Modifier | Best Use |
|---|---|
| Softboxes | Diffuse light for even coverage |
| Umbrellas | Broaden and soften the light |
| Diffusion panels | Reduce contrast and soften shadows |
| Beauty dishes | Focused but softened, natural look |
| Reflectors | Fill shadows with soft reflected light |
Additionally, experimenting with different light modifiers can help achieve the most natural and seamless background integration.
Diffusers and Reflectors
Diffusers and reflectors are essential tools for softening harsh edges and creating a more natural, even light on your green screen subject. These light modifiers help spread light evenly, reducing sharp shadows and glare that can make edges stand out. Diffusers are typically translucent materials that you place in front of your light sources to disperse the beam, creating a softer, more flattering illumination. Reflectors bounce light back onto your subject, filling in shadows and smoothing out inconsistencies. By carefully choosing and positioning these light modifiers, you can control the quality of your lighting, minimizing harshness and ensuring your green screen edges stay clean and seamless. Using diffusers and reflectors effectively elevates your setup, producing professional-looking results with less editing needed. Incorporating proper lighting techniques can further enhance the overall quality and realism of your green screen setup.
Tips for Lighting Your Subject to Minimize Shadows on the Green Screen
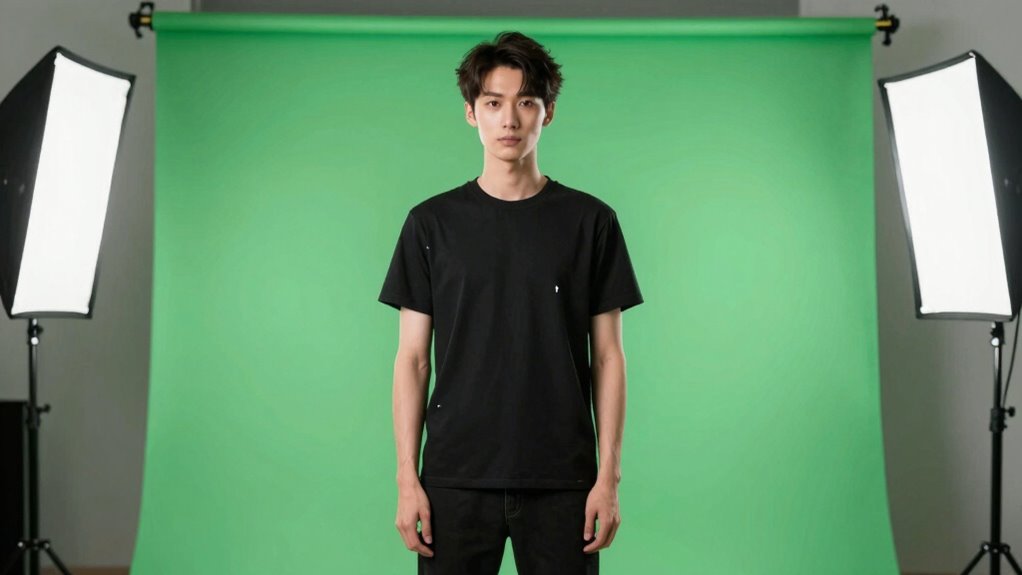
Lighting your subject properly is vital for minimizing shadows on the green screen. Focus on adjusting the color temperature of your lights to match the environment or create a natural look, preventing color disparities that can cause shadows to stand out. Proper light placement is essential; position your lights at a 45-degree angle on either side of your subject, slightly above eye level, to evenly illuminate without casting harsh shadows. Use soft, diffused lights to spread light evenly and reduce sharp edges. Keep the lights close enough to minimize shadow size, but avoid so close that hot spots occur. Consistent lighting ensures your subject remains evenly lit, making it easier to key out the background cleanly. Additionally, paying attention to lighting consistency helps prevent shadows from becoming more prominent during post-production.
Common Lighting Mistakes That Cause Shadows and Rough Edges

One of the most common mistakes that cause shadows and rough edges is uneven lighting, which happens when you don’t balance your light sources properly. Poor light placement can create hotspots or dark areas, leading to inconsistent shadows on your subject and green screen. Additionally, mismatched color temperature between lights results in unnatural color shifts that highlight edges instead of blending them seamlessly. To avoid this, ensure your lights are evenly spaced and directed at the subject from appropriate angles. Use lights with the same or closely matched color temperature to maintain consistent tones. Proper light placement and consistent color temperature help minimize shadows and rough edges, creating a cleaner, more professional green screen setup. Paying attention to lighting quality can further improve the overall image.
Practical Green Screen Lighting Setups for Different Environments

Adapting your green screen lighting setup to different environments is essential for achieving professional results. Every space has unique lighting conditions, so using the right green screen accessories, like portable softboxes or adjustable LED panels, helps you control light precisely. In bright, natural settings, you’ll need to focus on ambient light control to prevent unwanted shadows and color spill. For indoor setups, adding flags or barn doors can direct light where you want it and minimize spillover. In small rooms, ensure your lights are positioned to evenly illuminate the green screen without creating hotspots. Tailoring your setup based on the environment helps ensure a clean, shadow-free background, making post-production easier and your final footage more seamless. Incorporating lighting techniques can further enhance your setup and improve overall image quality.
Using Backlights and Fill Lights for a Seamless Green Screen Effect

To achieve a seamless green screen effect, incorporating backlights and fill lights into your setup makes a significant difference. Backlights help separate your subject from the background, preventing shadows and creating depth. Choose lights with a consistent color temperature to match your key light, ensuring even light distribution across your subject. Fill lights soften harsh shadows caused by the backlight and help balance overall illumination. Proper light distribution ensures that no areas are overly bright or dark, which is essential for clean edges. Adjust the intensity of your backlights and fill lights carefully—too much can cause glare, too little may leave shadows. Using lighting techniques like proper placement and intensity adjustment can further enhance your green screen quality. By fine-tuning these elements, you create a more natural, professional look with minimal edge issues or shadows.
Troubleshooting Shadows and Edges That Won’t Go Away

Shadows and unwanted edges often persist on green screens despite careful lighting, but these issues usually stem from specific setup mistakes or insufficient adjustments. First, check your light’s color temperature; mismatched temperatures create color spill and harsh edges. Ensure your lights are consistent and balanced to avoid uneven color reflections. Adjust the light intensity to eliminate shadows—if one side is brighter, shadows will appear more prominent. Use soft, diffused lighting to reduce harsh edges, and reposition lights closer or further as needed. Sometimes, adding a slight backlight or adjusting the angle can minimize shadows. Additionally, understanding the importance of proper light placement can significantly improve your results. Consistently monitor your setup with a color meter or camera preview to spot subtle inconsistencies early and fine-tune your lighting for a seamless green screen effect.
Frequently Asked Questions
How Do I Determine the Ideal Distance Between Lights and Green Screen?
You should keep your lights about 3 to 10 feet away from the green screen, following distance guidelines for even illumination. Start with a moderate distance, then adjust based on your setup. Proper light positioning guarantees the green screen is evenly lit, preventing shadows and color spill. Test your lighting and tweak the distance as needed to achieve a smooth, shadow-free background that makes keying easier.
What Color Temperature Should I Use for Green Screen Lighting?
You should use a color temperature around 5500K for green screen lighting, as it provides daylight-balanced light that guarantees consistent lighting and easy keying. Maintaining lighting consistency is vital to avoid shadows and edges that look unnatural. Using this color temperature helps your green screen appear even, which simplifies post-production work and produces a professional look. Stick with daylight-balanced bulbs for the best results.
Can LED Lights Be Used Effectively for Green Screen Setups?
Think of LED lights as reliable lanterns guiding your green screen shoot. Yes, they work effectively because of their high efficiency and low power consumption, making your setup more sustainable and cost-effective. Their consistent brightness helps eliminate shadows and edges, giving you a clean key. Plus, LEDs offer adjustable color temperatures, ensuring you get the perfect light for your green screen, making your background seamless and professional.
How Do I Prevent Spill or Color Contamination on the Subject?
To prevent color spill and subject contamination, you should position your green screen lights carefully, keeping them out of the subject’s reach and angle. Use flags or barn doors to block light from hitting the subject directly. Additionally, adjusting the distance between the subject and the screen minimizes spill. Proper lighting and placement ensure clean edges, minimizing unwanted reflections and maintaining a professional, seamless chroma key effect.
What Are the Signs of Overexposure or Underexposure in Green Screen Lighting?
In chromakey troubleshooting, signs of overexposure include a washed-out green background with blown-out highlights, while underexposure shows a dull, dark green that lacks detail. You can detect these issues by checking the lighting color balance and ensuring even illumination. Adjust your lights accordingly; overexposure needs less intensity, and underexposure requires more. Proper lighting setup helps you achieve a clean key and smooth edges.
Conclusion
Did you know that poor green screen lighting can lead to up to 30% more editing time due to shadows and rough edges? By mastering proper lighting techniques—like even illumination, soft shadows, and strategic placement—you’ll achieve cleaner keys and save yourself hours in post-production. Remember, investing in good lighting setups today makes your green screen footage look professional and polished tomorrow. Start applying these tips and watch your videos transform effortlessly!